How to Export Expense Data for Tax Returns
If I want my tax return to go smoothly, I need one clean export with dates, suppliers, amounts, categories, payment method, VAT details, and linked receipts. That is the core job.
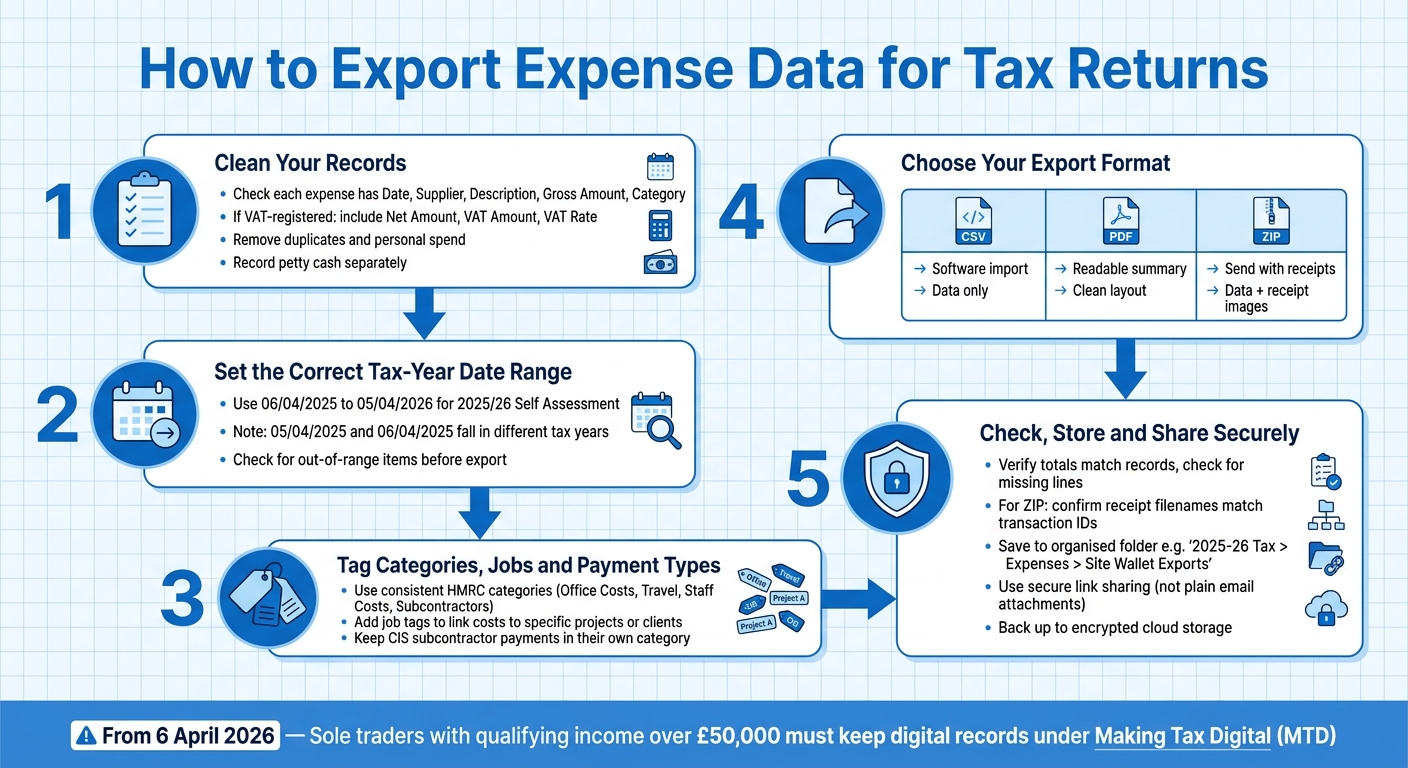
From 6 April 2026, sole traders with qualifying income over £50,000 must keep digital records and send quarterly updates under Making Tax Digital. On top of that, I need to keep records for at least 5 years after the 31 January Self Assessment deadline. So before I export anything, I make sure the data is tidy, in the right tax-year range, and easy to trace back to each receipt.
Here’s the short version:
- I check each expense has the date, supplier, description, gross amount, and category
- If I’m VAT-registered, I include net, VAT amount, and VAT rate
- I keep receipt references and receipt images linked to each line
- I record petty cash separately and remove duplicates or personal spend
- I use the right tax-year dates, such as 06/04/2025 to 05/04/2026
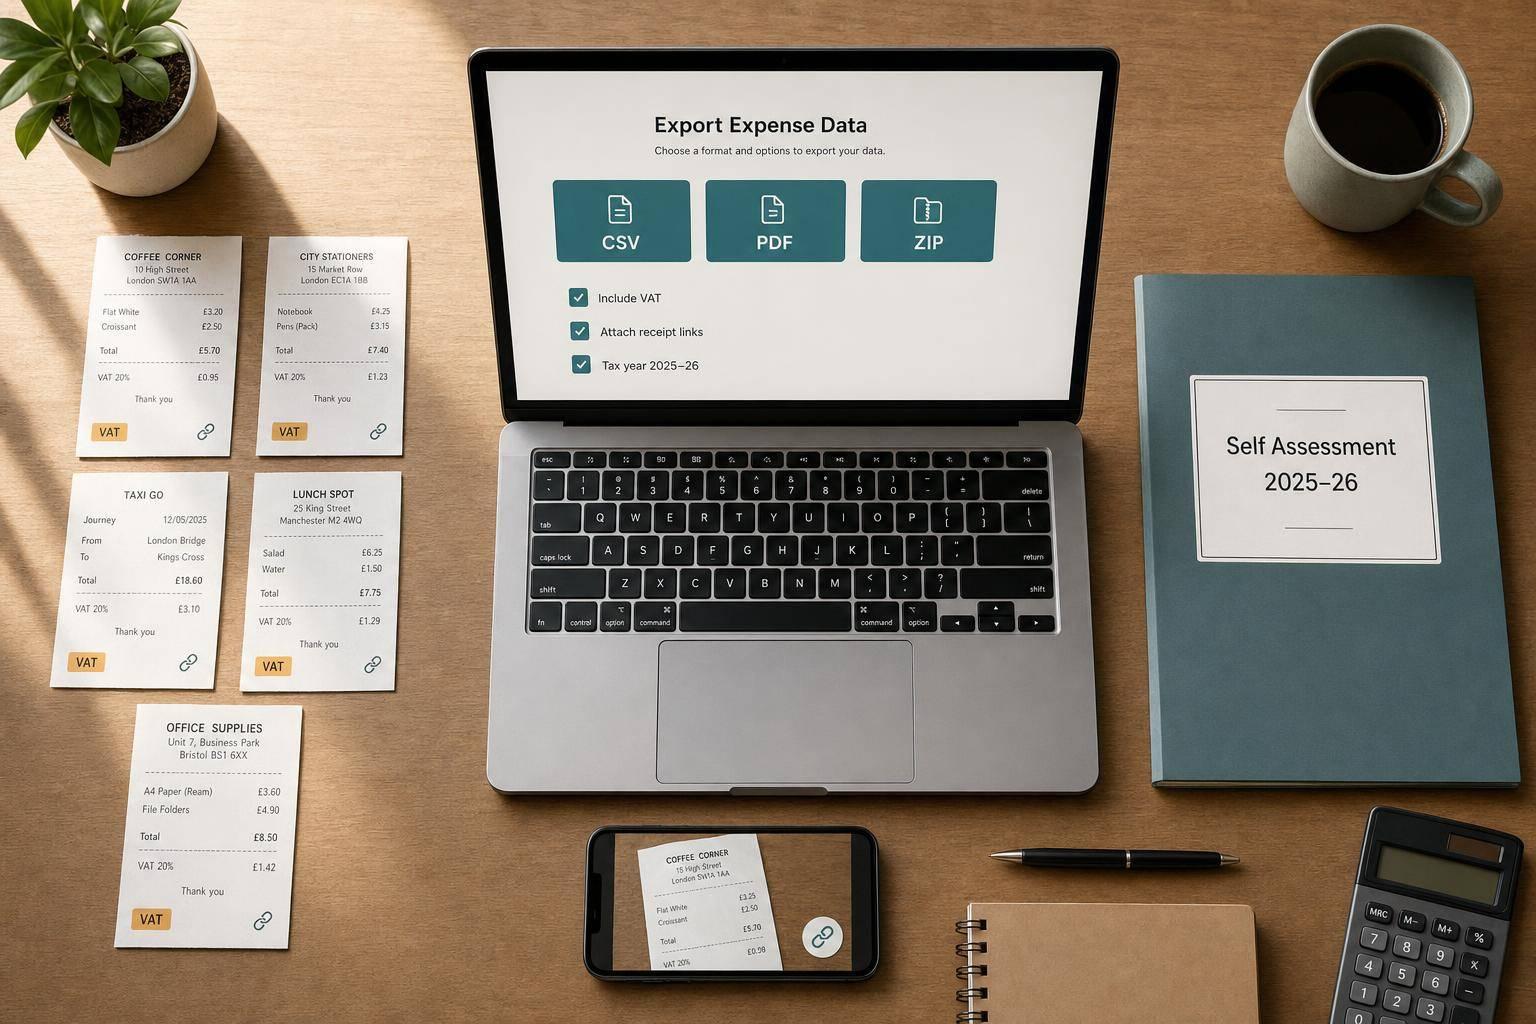
- I export in the format I need:
- CSV for bookkeeping software
- PDF for a readable summary
- ZIP for data plus receipt files
- I check the export before sending it and store it in a clear folder with a clear filename
A few details make a big difference. For example, 05/04/2025 and 06/04/2025 fall into different tax years. And if a receipt file does not match its transaction line, fixing it later can take far more time than checking it now.
| Format | Best for | What I get |
|---|---|---|
| CSV | Importing into software | Data only |
| Sending a readable file | Summary view | |
| ZIP | Sending records with proof | Data + receipts |
That’s the full process in plain terms: clean the records, set the right dates, export the right file, then store and share it safely.
How to Export Expense Data for Tax Returns: Step-by-Step Guide
How to Track Sole Trader vs Personal Expenses Automatically (Excel)
sbb-itb-12417dd
What HMRC-ready expense exports should include
A tax-ready export needs more than dates and totals. Each line should show what was bought, who was paid, when it happened, how much it cost, and which category it belongs to. On top of that, you’ll want the extra detail that makes the data usable later: payment method, VAT split, receipt reference, and job tag.
Core transaction fields to check
Each line should include the basic facts of the spend, not just a bank entry. If your business is VAT-registered, include net amount, VAT amount, and VAT rate in separate columns. That way, the tax side is clear from the start instead of being pieced together later.
It also helps to place every expense into an HMRC category before export, such as office costs, travel, staff costs, or subcontractor/labour costs. That saves your accountant from having to sift through the file and sort it all by hand.
| Field | Why It Matters |
|---|---|
| Date (dd/mm/yyyy) | Confirms when the expense was incurred |
| Supplier | Identifies who received the payment |
| Description | Shows the business purpose of the spend |
| Gross Amount (£) | Total paid, including VAT |
| VAT Amount | Helps VAT-registered businesses separate tax correctly |
| Payment Method | Shows whether the cost was paid by card, cash, or bank transfer |
| Category | Maps the expense to an HMRC category |
| Receipt Ref | Links the line item to the stored receipt image |
| Job Tag | Ties the cost to a specific project or client |
These fields keep the export clean before you choose a file format.
Receipts, petty cash and job tags
A photo on its own is not enough. You should store the extracted date, supplier, amount, and VAT details alongside the receipt image. Each line item should also have a receipt reference, such as 2026-03-14-AMZN-001, so it can be traced back to the stored image if HMRC asks for proof.
Cash payments need the same care. Record each one separately with its own date, amount, and category. Keep petty cash purchases apart from bank-fed transactions so the audit trail stays clear and easy to follow.
Job tags matter too. Add one to each expense so materials, fuel, and subcontractor costs can be matched to the right job or client.
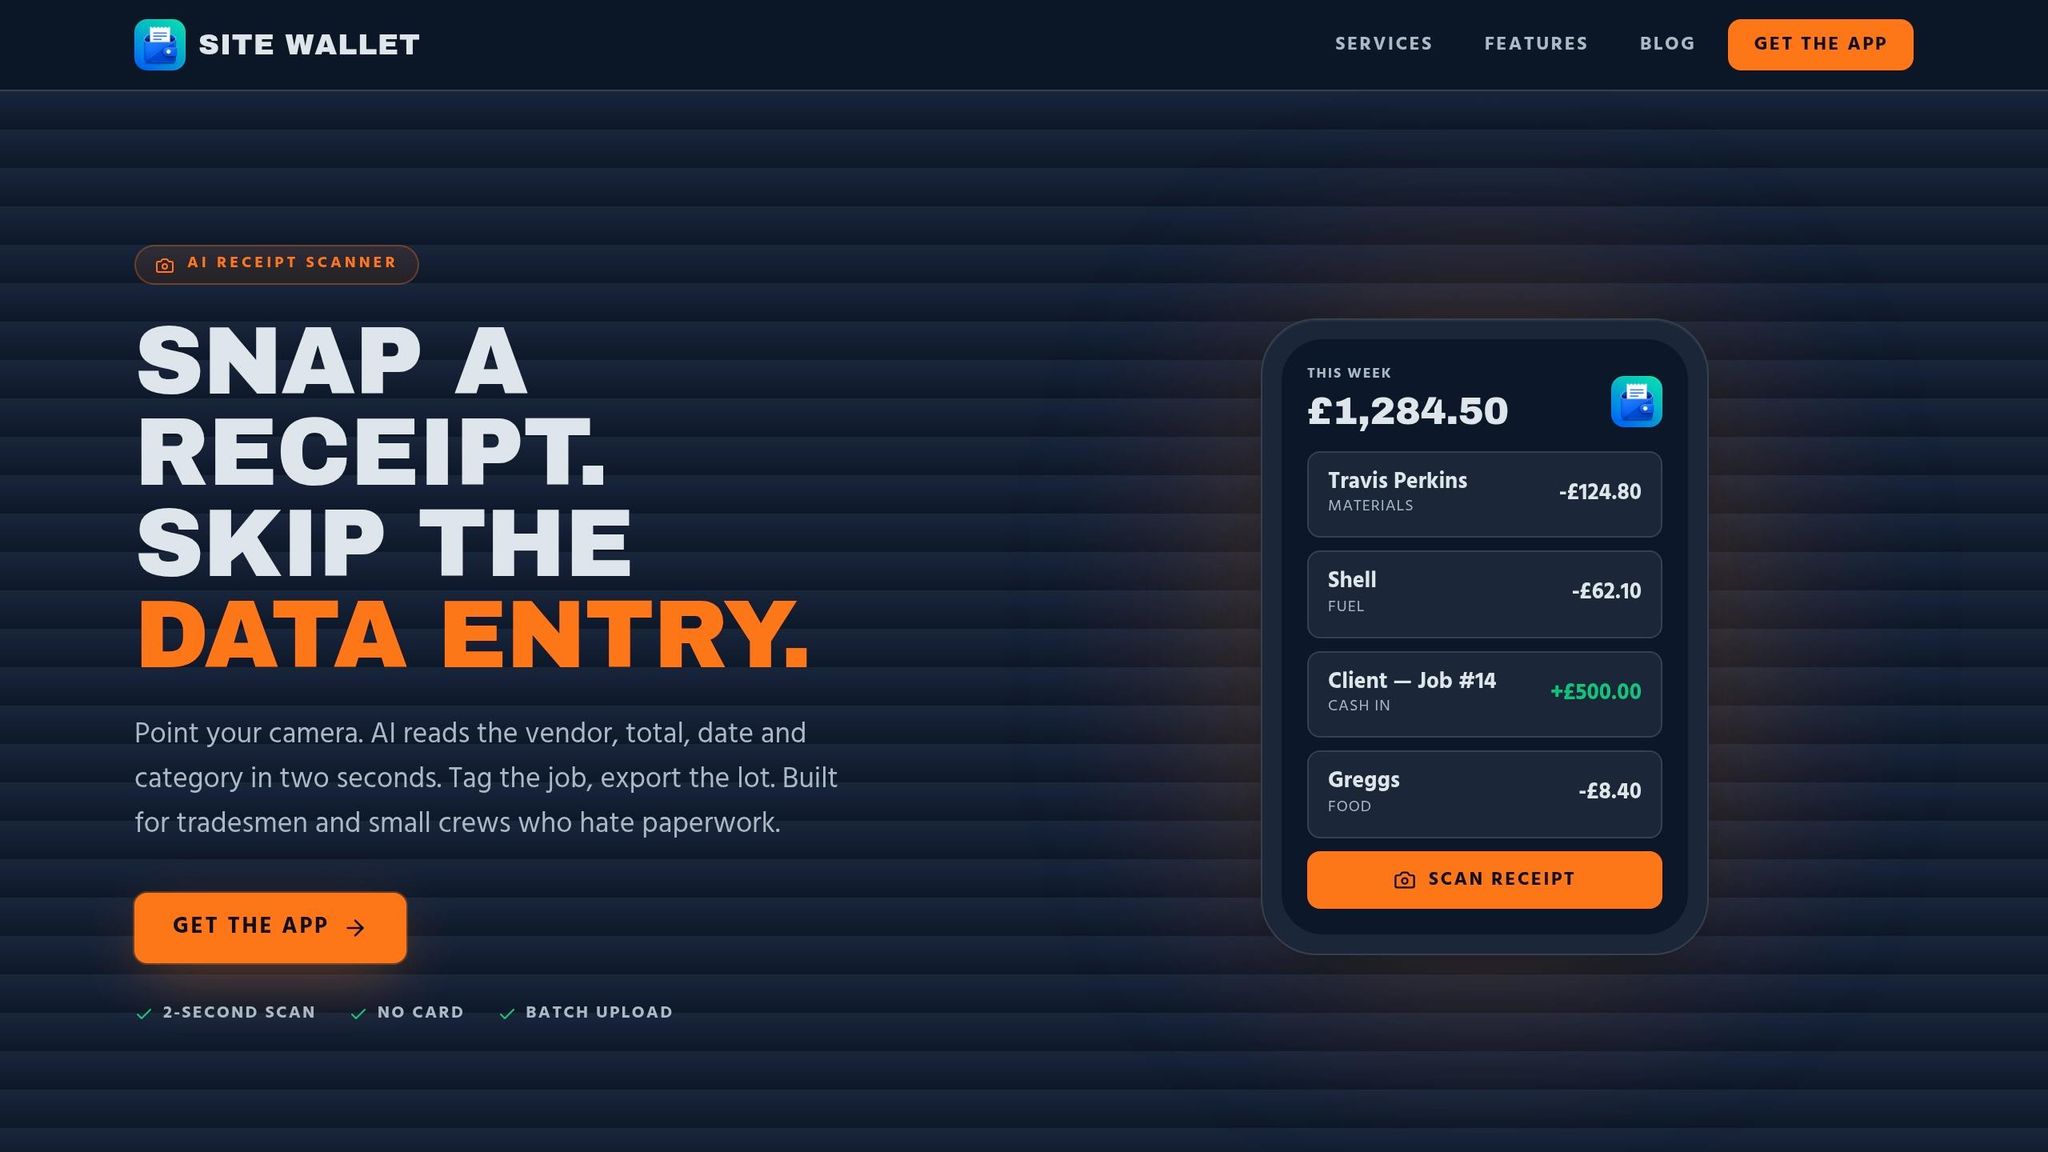
Once these fields are consistent, your data is ready to prepare in Site Wallet for export.
Prepare your expense data in Site Wallet before you export
After you’ve checked the required fields, clean up the records before export. It saves time, and it’s far less painful than fixing mistakes later.
Capture and review receipts
Use Site Wallet’s receipt scanning to photograph or scan receipts as you buy something, before thermal ink fades or the receipt disappears. OCR (text recognition) can prefill the fields, but don’t leave it there; check them against the original receipt.
Start with the date. 06/04/2025 sits in 2025/26; 05/04/2025 does not. Also watch for items that look like capital expenditure, such as power tools or a van, and keep them apart from day-to-day running costs. Use the note field only when you need extra context, like a mixed-use item or an unclear supplier.
Once each receipt has been checked and tagged, move on to labelling everything the same way.
Tag categories, jobs and payment types consistently
Use the same label every time: Fuel and van costs, Materials, Tools, Subcontractors, PPE/Clothing, Office/Software. If you call the same spend “materials” one week and “supplies” the next, you create extra sorting work for your accountant and make it easier for something to land in the wrong category.
Keep CIS subcontractor payments in their own category so they’re easier to reconcile. For mixed-use expenses, such as a mobile phone or broadband bill, record only the business share and note the percentage split you’ve used. Add a job tag to each expense too, so materials, fuel and labour costs can be matched to the right site or client when the file is checked.
When your labels are lined up, set the date range and review the filtered list.
Set the correct export period
Before you generate any file, set the date range to match your accounting period. For most sole traders, that means 06/04/2025 to 05/04/2026 for the 2025/26 Self Assessment return.
Check for out-of-range items, duplicates and personal spend before export. If anything is sitting in the catch-all Other business expenses category, move it into a more specific HMRC bucket. Once the period is set, export the cleaned file in the format you need.
Choose the right export format and export from Site Wallet
Once your records are clean and tagged, the next step is simple: export them in the format your accountant or software needs.
When to use CSV, PDF or ZIP
Pick the format based on what happens next. If the file is going into software, use the format that fits that workflow. If someone needs to read it, use the format that makes that easy.
| Format | Best use case | Pros | Cons |
|---|---|---|---|
| CSV | Software import | Flexible, easy to filter and sort | Not visually readable; no receipt images |
| Readable summary | Clean layout, opens on any device | Can't be imported into accounting software | |
| ZIP | Receipts plus data | Complete evidence bundle in one file | Larger file size; needs unzipping first |
Use PDF when you want a clear summary for your accountant or for your own files. Use ZIP when you need to send both transactions and receipts together for review.
How to export step by step
- Navigate to the Export or Reports menu in Site Wallet.
- Select the saved tax-year range.
- Apply the saved job or category filter.
- Choose your format: CSV, PDF or ZIP.
- Download the file or share it securely with your accountant.
If you need a job-specific export, filter by the relevant job tag.
Check the exported file before sending it
Before you send anything, give the export a quick check. It only takes a minute, and it can save a back-and-forth later.
Open the file and make sure it works as expected. For CSV, check the date format, £ amounts to two decimals, and consistent category labels. Then confirm the totals match your records and scan for missing lines or duplicates.
For a ZIP, check that the receipt filenames match the transaction IDs.
Store, share and keep your tax exports secure
Once you've checked the export, save it somewhere that makes filing and retrieval simple.
Organise files so they are easy to find later
Use a clear folder structure on your device or in cloud storage. A setup like 2025-26 Tax > Expenses > Site Wallet Exports works well, with separate subfolders for CSVs, PDFs and receipt images.
File names matter too. Site-Wallet-Expenses-2025-26.csv tells you what the file is, where it's from and which tax year it covers. By contrast, something like export_final_v2.csv won't mean much in six months' time.
Create a new folder for each tax year on 6 April and move older records into a Closed tax years folder. If you keep multiple tax years mixed together, it's much easier to make reconciliation mistakes when year-end filing comes around.
Share and back up records safely
After saving the export, send it using a secure link instead of attaching it to a plain email. For example, use a link that stays live for 30 days, so your accountant can get the file only when needed. Site Wallet keeps records secure, but how you share them still counts.
Save each export to encrypted cloud storage as well as keeping a local copy. If records go missing, filing can be delayed and you may face penalties that could have been avoided.
Conclusion: The simple route to tax-ready expense records
Once the file is stored, shared and backed up, the main thing is consistency. Keep your receipts, tags, exports and backups in order, and your records stay ready for filing.
FAQs
What if some receipts are missing?
Missing receipts can put your tax return at risk. HMRC may ask for clear proof of business costs, and if you can’t show it, things can get messy fast.
Without a receipt, it’s harder to prove an expense was wholly and exclusively for business. That can lead to claims being turned down, or in some cases, penalties.
If a receipt goes missing, don’t panic. You can still use other records, such as:
- bank statements
- order confirmations
What matters is keeping a durable, searchable record of all expenses, invoices and statements for at least five years.
Do I need a CSV, PDF or ZIP export?
Not necessarily. For tax purposes, CSV and PDF are usually the main formats that matter.
A CSV is often the minimum your accountant needs to import transaction data into accounting software. A PDF is handy when you need to share clear reports or receipt copies with HMRC. ZIP files can group documents together, but the main thing is having clear, categorised data that lines up with your Self Assessment records or your accounting software.
How do I handle mixed personal and business expenses?
If an expense is part personal and part business, only claim the business share. Don’t put through the full amount. Instead, work out a reasonable percentage for business use and keep a note showing how you reached it.
For example, if 60% of your mobile phone use is for work, claim 60% of the bill. Add a short note to your records, such as "50% business use", so you can refer back to it later.