
How to Scan and Organise Receipts by Job Site
Organising receipts by job site is essential for tradesmen to track expenses accurately, improve profits, and comply with tax laws. From April 2026, Making Tax Digital (MTD) will require digital records for sole traders earning over £50,000. Scanning receipts digitally prevents losing key records, ensures compliance, and can even increase tax refunds by capturing every allowable expense.
Here’s how you can stay on top of your receipts:
- Scan receipts immediately using apps with AI-powered OCR for near-perfect accuracy.
- Tag receipts by job site with details like project name, date, supplier, and VAT breakdown.
- Organise files digitally with consistent folder structures and naming formats (e.g.,
YYYY-MM-DD_Supplier_Amount). - Secure and back up your records using encrypted cloud storage and the 3-2-1 backup rule.
- Export and review receipts in formats like PDF or CSV for tax submissions or financial analysis.
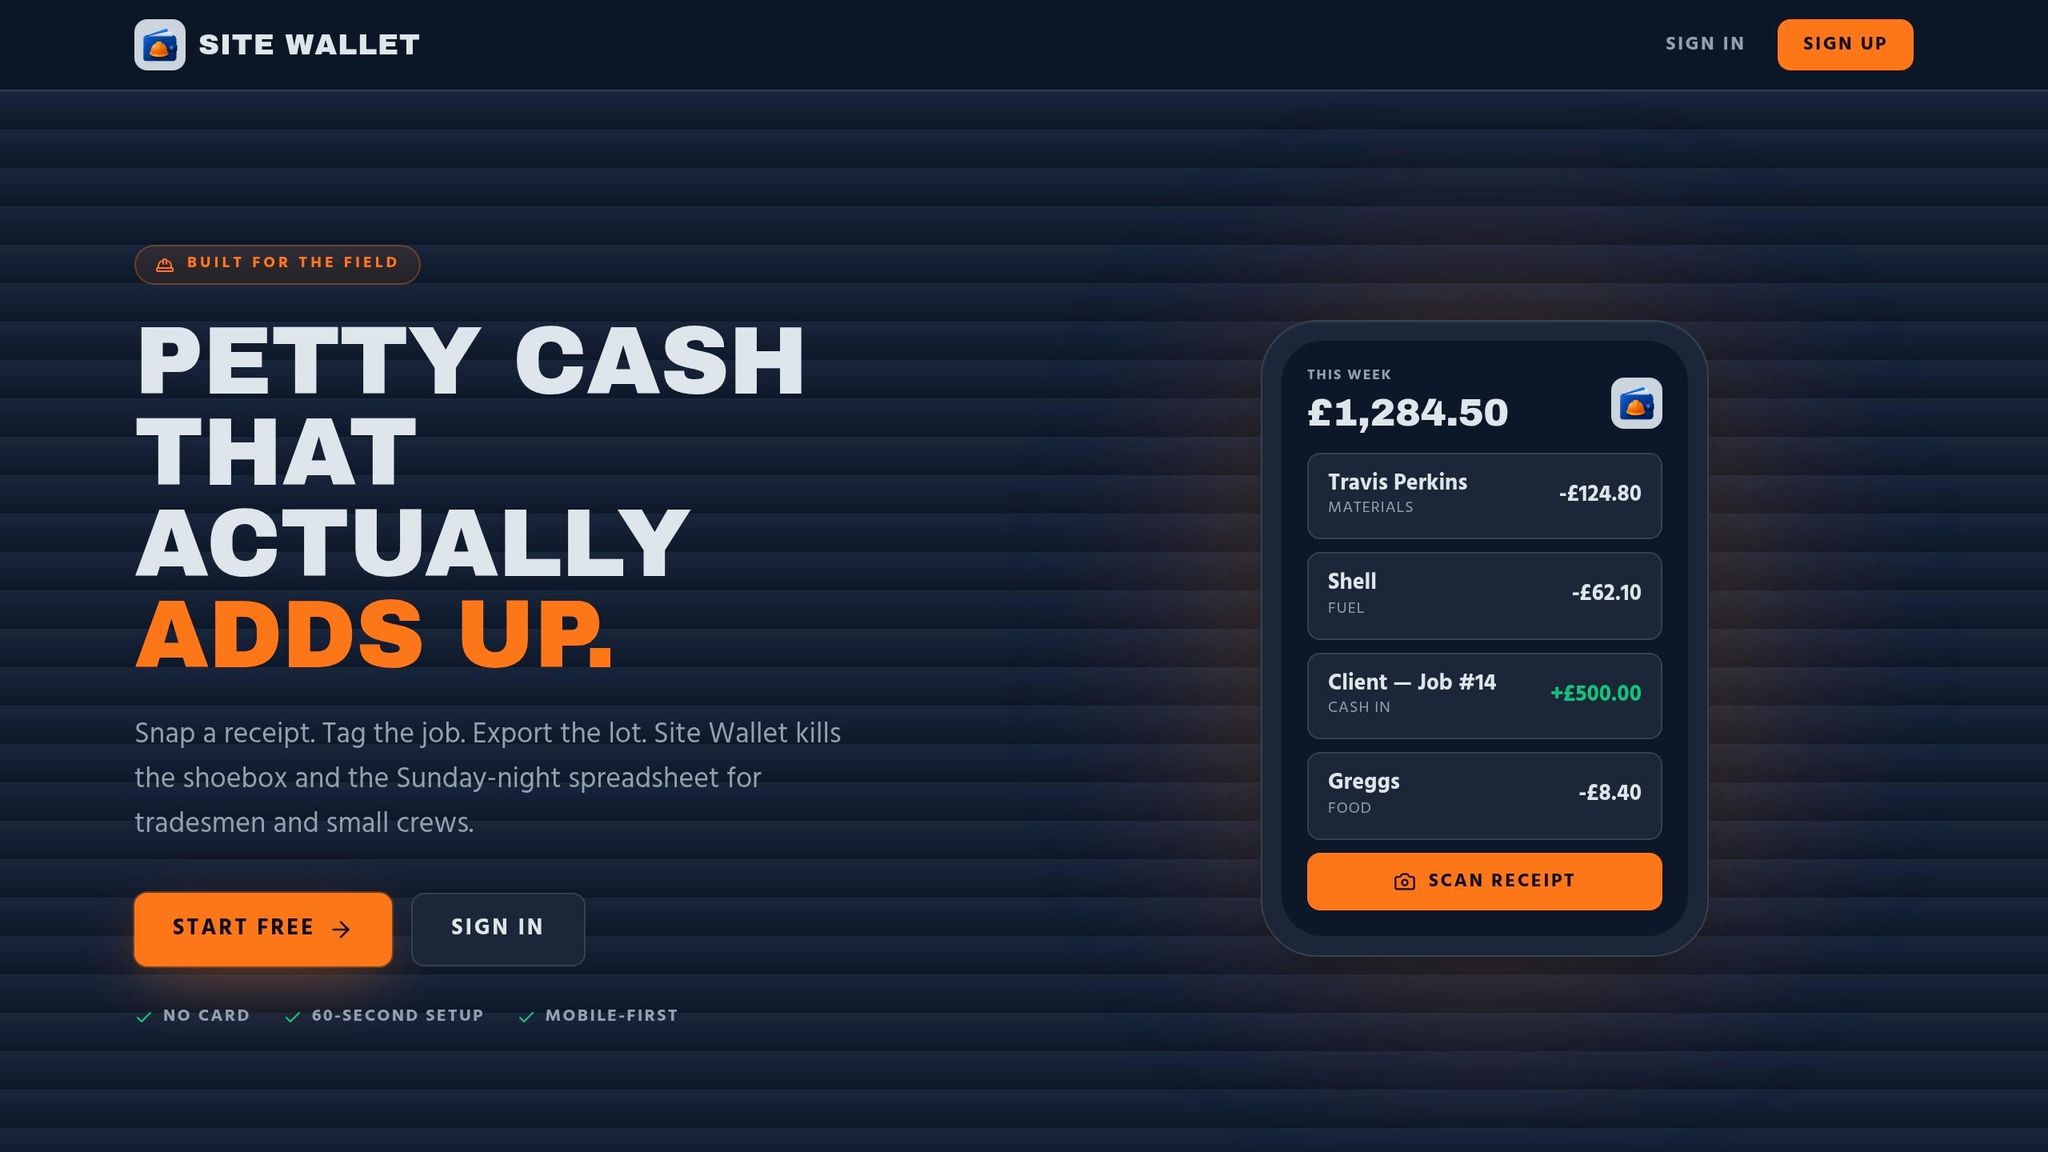
Using tools like Site Wallet, you can simplify this process, avoid tax penalties, and gain better control over your finances.
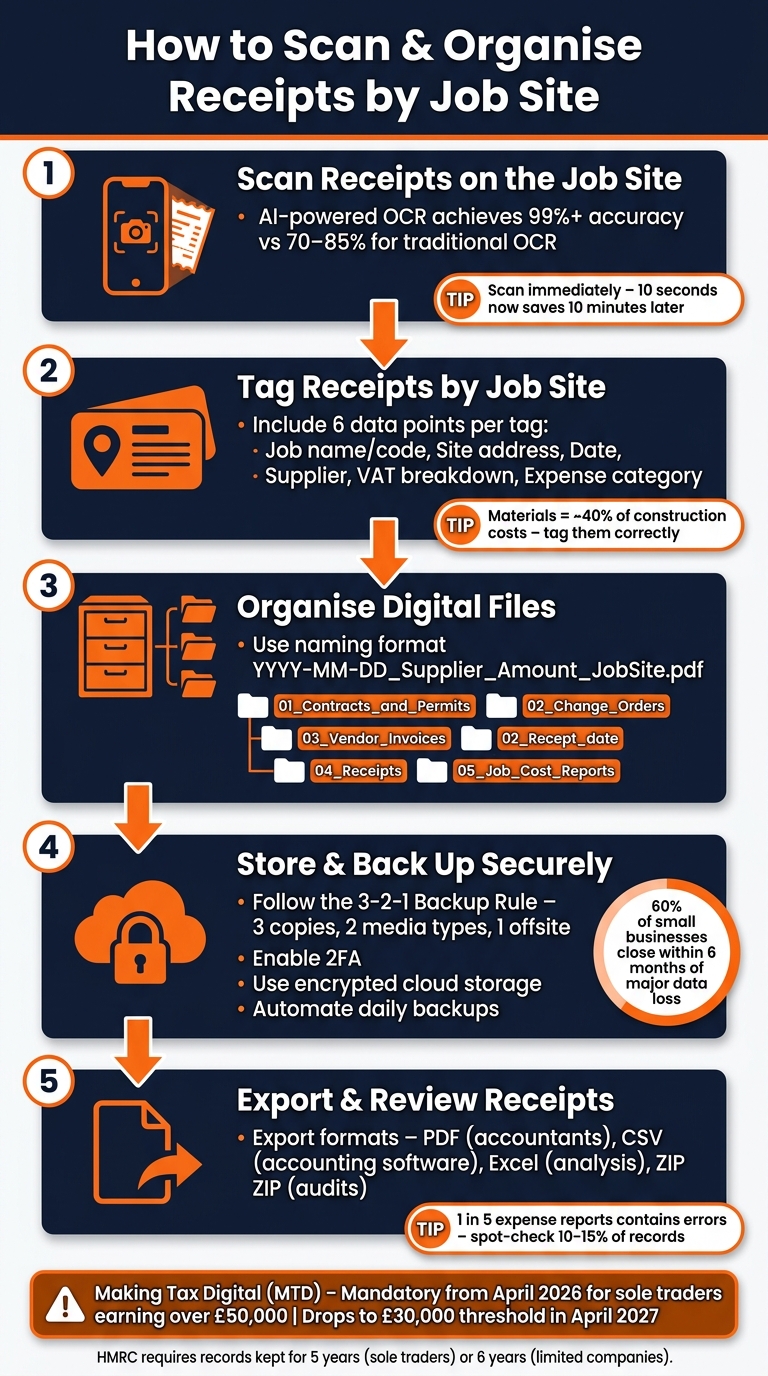
How to Scan & Organise Receipts by Job Site: 5-Step System
🧾 How to Scan & Organize Receipts! The Easy Way
sbb-itb-12417dd
Step 1: Scan Receipts on the Job Site
Scan receipts as soon as you get them. Whether you're at a builders' merchant, hire yard, or petrol station, taking a few seconds to do this can save you a lot of time later. Once scanned, the images are added to your digital filing system, making it easy to tag them by job site.
Using Mobile Scanning Apps
Choose an app that includes AI-powered OCR (Optical Character Recognition). This technology reads and extracts key details like the merchant name, date, total amount, and VAT directly from the receipt image. It removes almost all the need for manual data entry. While traditional OCR methods are only 70–85% accurate, AI-powered OCR achieves over 99% accuracy - a game-changer when you're handling dozens of receipts every month.
Features like edge detection and auto-cropping are also helpful. These tools automatically identify the edges of the receipt and remove any unnecessary background, leaving you with a clean, professional scan. Saving receipts as PDFs, rather than just photos, makes them easier to search, share with your accountant, or submit to HMRC. For example, Site Wallet supports PDF export alongside CSV, covering both record-keeping and accounting requirements in one go.
"The best time to scan a receipt is the moment you receive it. Ten seconds now saves ten minutes of searching later." - TapTax Team
Make sure the app works offline. If you're on a remote site with poor signal, you'll need an app that lets you capture receipts without an internet connection and sync everything later once you're back online. This is especially important on larger construction sites where mobile coverage can be unreliable. Capturing receipts digitally ensures every expense is recorded and ready for review.
Tips for Getting a Good Scan
The quality of your scan matters. A clear scan ensures the app can read the receipt accurately. Here’s how to get the best results:
- Place the receipt on a flat, dark surface to make it stand out.
- Smooth out any creases and scan in consistent, shaded lighting to minimise shadows.
- Hold your phone steady and ensure all four edges of the receipt are visible in the frame. Avoid cutting off the top (where the merchant name often appears) or the bottom (where VAT details are typically found).
- After scanning, double-check that the total, date, and supplier name have been captured correctly before saving.
Taking these extra steps ensures your records are accurate and ready for future use.
Step 2: Tag Receipts by Job Site
Once you've scanned a receipt, the next step is to assign it to the correct job site immediately. Doing this while you're still on site - or right at the point of purchase - saves you the headache of trying to remember later whether that bag of fixings or fuel stop belonged to a specific project. As Harrisons Accountants point out: "The biggest mistake CIS contractors make? Leaving record-keeping until they're back at home, exhausted, and can't remember which receipt belongs to which job." To make this process seamless, it’s crucial to include all the essential details in each tag.
What to Include in Each Tag
For a receipt to be useful for job costing, tax filing, or audits, it needs to include certain key details. At a minimum, every receipt should be tagged with:
- Job name or project code
- Site address
- Date of purchase
- Supplier name
- Total amount with VAT breakdown
- Expense category (e.g. materials, fuel, plant hire, or PPE)
If you're working under the Construction Industry Scheme (CIS), there’s an extra step to consider: separating labour costs from material costs on receipts or invoices. Harrisons Accountants explain why this is so important: "Under the Construction Industry Scheme, the materials portion of your invoices isn't subject to the same CIS deductions as labour. If you can't separate these costs clearly, you could end up overpaying tax." Since materials typically make up about 40% of construction costs, getting this breakdown right can have a tangible financial impact.
For any expense that isn’t immediately obvious, add a brief business purpose note. For example, you might write "timber for loft conversion, Baker Street job" or "fuel for site visit, Greenfield Road." Tax authorities often reject claims that don’t clearly explain why an expense was necessary.
Keeping Tags Consistent
A tagging system only works if it’s consistent. For instance, if one receipt is tagged "Screwfix – materials" and another says "screwfix matls", they won’t group together properly in reports or exports. Taylor Edginton of Edgestrat Finance highlights this point: consistency eliminates guesswork.
The simplest way to maintain consistency is to agree on a standard set of category names upfront and stick to them. Experts recommend limiting your expense categories to around 15 to minimise errors. With tools like Site Wallet, job tags can be applied as soon as the receipt is captured. This ensures every receipt is tied to the correct project from the start, making it easy to pull up all expenses for a specific job site when it’s time to review or export.
Step 3: Organise Your Digital Receipt Files
Once your receipts are scanned and tagged, the next step is to store them in an organised, easily accessible digital system. A clear filing structure ensures that receipts are readily available for cost reviews or tax-related queries. Without a proper system, even the most meticulously scanned receipts can become a hassle to locate when preparing job cost reports or responding to HMRC inquiries. A straightforward and consistent folder structure can eliminate this problem.
Setting Up a Clear Folder Structure
Start by organising your folders by year and job site. A naming convention such as 2026_ProjectName_JobSite (e.g., 2026_LoftConversion_BakerStreet) works well for creating top-level folders that are easy to identify. As Taylor Edginton from Edgestrat Finance notes: "Consistency removes decision-making. No one should wonder where something goes."
Inside each project folder, use simple and standardised sub-folders for every job:
| Sub-Folder | Purpose |
|---|---|
01_Contracts_and_Permits |
Legal and regulatory documents |
02_Change_Orders |
Records of scope changes and variations |
03_Vendor_Invoices |
All supplier invoices collected in one place |
04_Receipts |
Evidence of field purchases and petty cash expenses |
05_Job_Cost_Reports |
Summaries of financial performance |
This uniform structure makes it quicker to review job costs and simplifies audits. Avoid creating separate folders for individual cost codes; instead, keep all receipts in the 04_Receipts sub-folder for each job. This approach allows you to easily check for missing documents at a glance. Keep in mind that HMRC requires sole traders to retain business records for at least five years after the 31 January submission deadline, and six years for limited companies. Your filing system should be robust enough to meet these retention requirements.
Naming Receipt Files for Easy Search
Using a consistent naming format for receipt files can save you time when searching later. The format YYYY-MM-DD_Supplier_Amount works well - for example, 2026-05-28_Screwfix_145.50_BakerStreet.pdf. Starting with the date ensures files are sorted chronologically, while the supplier name and amount make it easy to identify receipts without opening them, even when dealing with large numbers of files.
Whenever possible, save receipts as searchable PDFs instead of image files. PDFs are better for long-term storage and allow for easier multi-page reviews. Since thermal receipts tend to fade quickly, filing them promptly ensures your records remain intact.
With your folder structure and naming conventions established, the next step is to securely store and back up your digital records.
Step 4: Store and Back Up Your Records Safely
Once you've scanned, tagged, and filed your receipts, the next step is to secure them. This is critical to avoid losing data due to device failures, accidental deletions, or cyber threats. Shockingly, 40% of freelancers lose receipts because they fail to back them up properly, and 60% of small businesses shut down within six months of a major data loss.
Secure Storage for Financial Records
With your files now organised, focus on keeping them safe. Choose a cloud storage provider that encrypts your data both during transfer and while it’s stored. To further protect your accounts, enable multi-factor authentication (2FA). This simple step significantly reduces the risk of unauthorised access.
Platforms like Site Wallet take security seriously by using encrypted data storage, ensuring that receipts are protected from the moment they’re uploaded. If you work with a bookkeeper or accountant, use features like granular access controls to manage what they can view or edit. This avoids the need to share full account access.
Once your files are securely stored, the next priority is to set up a reliable backup system.
How to Back Up Receipt Files
Even with secure storage, data redundancy is key to long-term safety. The 3-2-1 rule is a tried-and-tested method: keep three copies of your records, stored on two different types of media, with one copy kept offsite. For example, you could use your primary cloud account (like Site Wallet), a secondary cloud backup service, and an encrypted external hard drive stored away from your main workspace.
"A backup you've never restored is a backup you can't trust." - Connection Technologies
To avoid forgetting, automate daily backups. This eliminates the risk of human error. However, avoid relying solely on file-syncing services like OneDrive or Dropbox, as these are not true backup solutions. Instead, use dedicated backup tools that offer version history. Lastly, test your backups twice a year by restoring a few files to confirm everything works as expected.
Step 5: Export and Review Your Receipts
Once your records are safely stored and backed up, the next step is to convert them into a format that’s easy to use for accountants, tax submissions, or project evaluations.
Choosing the Right Export Format
The export format you select should align with how you intend to use the data. For example:
- PDFs are perfect for sharing with accountants or saving as a clean, print-ready archive.
- CSV files work best when you need to import data into accounting software.
- Excel (.xlsx) files are handy for detailed financial analysis, allowing you to use formulas and pivot tables.
- ZIP files are ideal for creating a comprehensive archive, bundling all receipt images in an organised way for audits or full backups.
Site Wallet supports exporting in PDF, CSV, and ZIP formats, giving you the flexibility to extract only what you need without exporting everything at once.
| Format | Best For |
|---|---|
| Sharing with accountants and archiving completed projects | |
| CSV | Importing data into accounting software |
| Excel (.xlsx) | Detailed cost analysis and financial reviews |
| ZIP | Full backups and audit-ready archives |
Once you’ve picked the right format, make sure to double-check your records before finalising the export.
Reviewing Expenses in Batches
Taking the time to review your data before exporting can save you from costly mistakes. Research shows that one in five expense reports contains errors, with each mistake costing an average of £40 and 18 minutes to fix.
"Divide this activity into two different tasks... creating batches and reviewing invoices... [then] reviewing the invoices in the batches before posting and exporting." - ServiceTitan
A good practice is to spot-check 10–15% of your records, focusing on high-value transactions. This approach helps you catch errors like incorrect totals (e.g., capturing the subtotal instead of the grand total) or mismatched date formats (DD/MM vs MM/DD), especially when dealing with international suppliers. Once you’re confident the data is accurate, use filters like job site tags and date ranges to ensure you’re exporting only the relevant records.
Conclusion: Managing Receipts More Efficiently with Site Wallet
Keeping track of receipts across job sites doesn’t have to be a time-consuming headache. The five steps in this guide - scanning on-site, tagging by job, organising digital files, backing up securely, and reviewing before export - provide a straightforward system that works whether you’re juggling one project or many. By following this approach, you can maintain a smooth, digital workflow with minimal effort.
A quick 10-second log on-site can give you instant financial clarity across all your projects. Considering that materials can account for up to 40% of total construction costs, having real-time insights into your spending can make a noticeable difference to your profit margins.
Site Wallet simplifies the entire process by automating data capture. It ensures every receipt is properly tagged, safely stored, and ready for export whenever you need it.
These improvements aren’t just about staying organised - they’re also about staying ahead of regulatory changes. From April 2026, Making Tax Digital (MTD) will be mandatory for sole traders earning over £50,000, with this threshold dropping to £30,000 in April 2027. Moving to a digital system now isn’t just a smart choice - it’s becoming a necessary one.
"The digital transition doesn't have to be painful. With the right setup, it actually makes your life easier: you'll have better visibility of your finances, fewer surprises at tax time, and more time to focus on the work you're good at." - Harrisons Accountants
FAQs
What counts as a valid receipt for HMRC?
To comply with HMRC requirements, a valid receipt must provide clear evidence of the expense being claimed. It should include:
- Transaction date: When the purchase occurred.
- Vendor’s name: The name of the seller or service provider.
- Total amount paid: The full cost of the goods or services.
- Description of goods or services: Details of what was purchased.
- Payment method: How the payment was made (e.g., cash, card).
For VAT-registered businesses, additional details are necessary:
- Supplier's VAT number: The VAT registration number of the seller.
- Tax amount: The VAT portion of the total cost.
- Supply date: When the goods or services were provided.
Digital copies of receipts are acceptable, but they must be clear, complete, and easy to read.
How do I handle receipts that cover more than one job?
To handle receipts for multiple jobs, choose an expense tool that allows receipt splitting. When you scan or upload a receipt, divide the total amount and tax across the relevant job sites. Double-check that the split amounts match the original total to ensure accuracy. Assign each portion to its specific project to keep records organised and aligned with HMRC requirements.
What’s the easiest way to share job receipts with my accountant?
The simplest solution is to use accounting software that allows you to attach digital images directly to transactions. Snap a photo of your receipts immediately after making a purchase and link them to the corresponding job. These records are stored in the cloud, organised within your accounts, and can be easily accessed by your accountant through a shared dashboard or by exporting the data. This eliminates the hassle of manually sorting receipts or emailing individual files.